Thursday, September 30, 2010

Organize with Recycled bottles

By now all those who read my blog know how much I love recycling..making plain items pretty and reusing!! I did this project in Zürich to organize my craft supplies. (I am so happy to see my stuff again tomorrow!!)


IMG_0907


This project came to my mind when I saw glass jar (just like a jam jar) with a pretty cap in a local mall. I was wondering why people are buying empty jam jars/bottles with a pretty lid. I mean you can recycle the ones you have already have at home!! So I came home and decided to do it myself. 


To do this project,all you need is a used, empty, cleaned glass bottle/jar. I used a jalapeño bottle and acrylic colors. Then remove the paper label. I used a bottle without any engraving or labels embossed on it.  


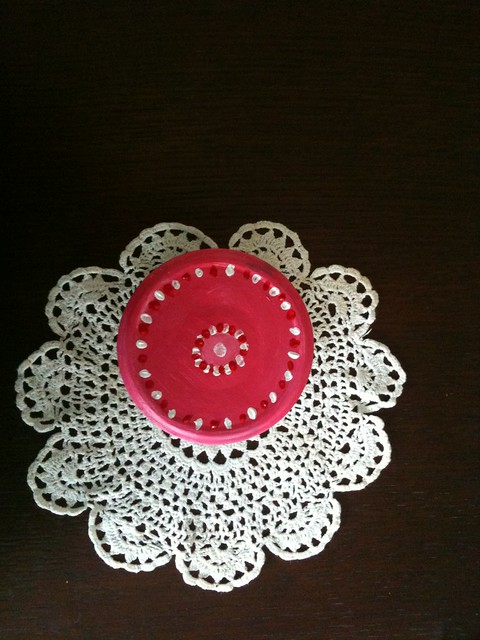
I painted it 2-3 coats. Let it dry for 1 hour or more..


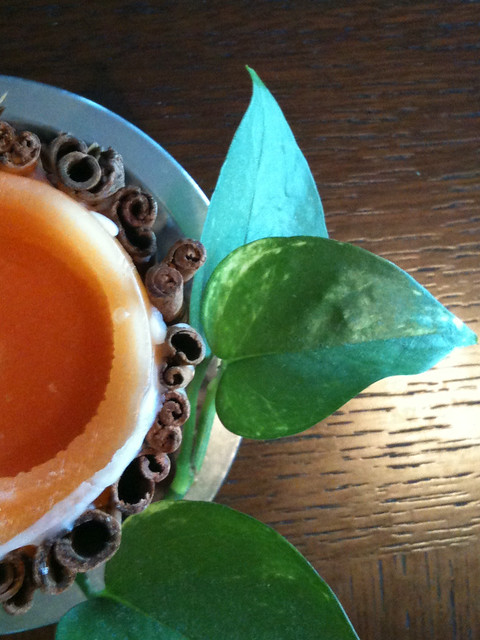
Decorate it whatever design you want using a stencil or painting directly..


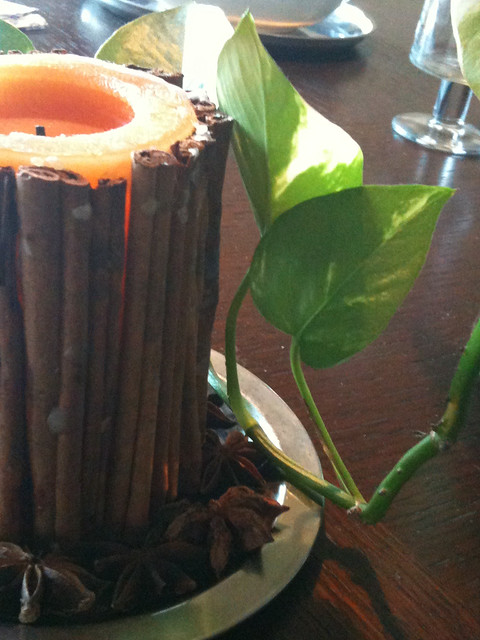
Store your craft or food items in your pretty jar..

IMG_0906

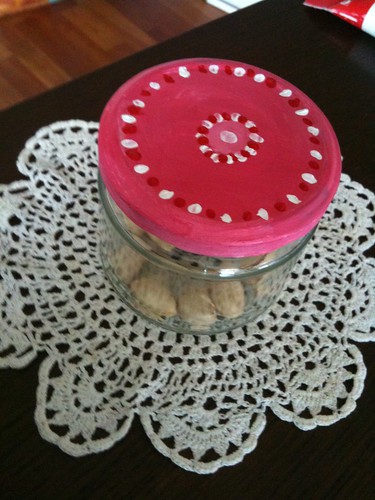
It's hard to tell if it is  reused bottle or  I bought a mass produced one from the mall:)

Recycling is good..It's very very good.. Just take a look at the pretty things people have created using recycled bottles.. 

                                                                                                   Pic courtesy: Metaefficient

The Christmas trees were made using recycled beer bottles..

                                                                                                                            Pic courtesy: Inhabitat

This Thai temple is build using more than one million glass bottles..It is a piece of art.. Check out more pics of the temple here..

                                                                        Pic courtesy: Jerry Kott

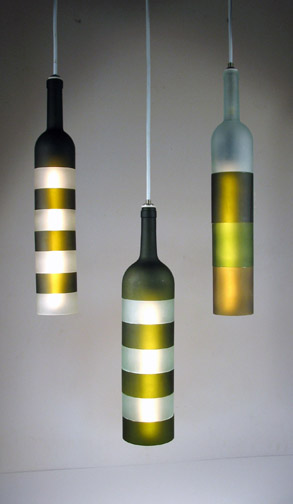
Jerry Kott's Lamps from recycled sculptures..

I am sure you are inspired... just a creative idea .. and you can make your own piece of art!! 


Tuesday, September 28, 2010

Spicy Fall Table decor

Spicy table decor

The autumn is finally here..Its time for sunny and rainy days ..cool evenings and shorter days... crimson leaves falling on the ground.... crisp air!!! 
It's time to celebrate fall/autumn season!!!!
I decided to make this fall table decor with down to earth, natural accessories..with some things which I feel describe the fall season...

spicy table decor

This is a table for two.. I love to do table decor and arrangement for me and my husband .Its fun and adds spice to everyday life. It makes regular and sometimes stressful days very special!!

Spicy table decor

I used wood, cork and spices to decorate this fall themed table. The highlight of the autumn season is the changing of color of leaves.. some lucky people get to see splendid shades and colors of the leaves in their region.. I see more of crunchy brown and some red leaves floating down and the intricate structure of the trees left bare and naked by the leaves:)  The crunchy leaves make a lovely sound when we walk on it!!! I really like it!!  That is  why I had the major color of the table decor as brown !!

Spicy fall decor

The centerpiece is made of pinecones.. I love to collect pine cones from our walks and strolls...I placed a medium sized pine cones in terracotta pots.Added some flowers and kept them in rattan tray with a scented candle!!


 A close up of the swiss dancing couple in their traditional clothes.. It is a Schweizer Heimatwerk (swiss handicraft) product.. hand carved from wood. It is not one piece..The lady can move round and I can arrange them in other dance poses as well.. A special gift from my husband !!!

spicy fall decor

I really like star anise spice.. It looks so pretty..I arranged 4 star anise around the Japanese bowls..and placed flowers in the soup spoon..lavender for him and yellow for me!!

spicy table decor


Browns and reds are the two main colors of fall..though I must admit I see more browns than reds.. exactly in the proportion of red color in my table decor:) I tied a red napkin and 2 cinnamon sticks with a white ribbon..Red color and cinnamon sticks give a festive effect.. This could be perfect idea for Christmas as well!!

spicy fall decor

The coasters are from Malaysia and have a beautiful design on them and a rattan border to them (you might have noticed them on the walls of my apartment from my earlier post

spicy table decor

I used cork as wine glass coater.. I am planning to paint on them some day when I get time..

Spicy table decor


On the other side I placed Balinese dolphin wood carvings..!!! So thats my spicy fall table inspired by nature and the seasons 
colors and charm..!! 
I recently saw pumpkins in the market..I want to do a orange decor next!!!

I will move into our new house in 2 days and am very excited!! Also my furniture has finally arrived by ship and I am so eager to see my dining table and things again!!! 
New decor projects... new walls to cover.. new DIYs.. new corners to be decorated... and all the odd corners, bare walls and some not-so-perfect areas are waiting for me to fix them....Yipeeee!!!

Linking to ever so beautiful table decor of Susan's Tablescape Thursday  and Marty's Tabletop Tuesday!!

giveaways

Friday, September 24, 2010

Kite festival in Singapore

Last weekend we went to see the kite festival in Singapore. This is a part of the ongoing Mid-Autumn festival.   We could see the kite flying high in the sky way before reached there. The place had a beautiful garden, a museum showing the importance of recycling and green technology. It was near the sea shore. We could see cargo ships and yachts ..some motorboats and sailboats too..


They were selling kites too. Many professional kite flyers had a big modern spindle ..maybe it is not that modernized but I had not seen kites and kite flyers since at least 10 yrs ..so everything was so awesome for me..We were a little early but still many enthusiastic people had there kites high in the sky..They looked awesome with Singapore's skyline behind ..


Kites were in many shapes and sizes .. Bats, Eagles, Penguin, Sting ray, butterflies and even tigers..The most popular seemed to be Delta,  Sleds and Diamonds kites. Some people had bought their own big kites and were assembling them which I had never seen.. and some were getting the kites from the venue itself..Some seemed amateur and some were pro...


My favorite was the eagle..I think it is a perfect design for a kite.. See this one below.Soaring high in the sky....going above all the diamonds, bats, sting rays...


There was another one that  I liked a lot  .. It was  really big one.. The  owner  assembled  its wings with the   supporting  rods meticulously.and once it was in the sky It seemed to be a winner..


Have a nice weekend everyone!!!!


Watch beautiful skies on Skywatch!!!!


Thursday, September 23, 2010

How to jazz up coasters, lamps and carpets - 3 tutorials in one post!!!

Whenever and wherever I find at a bargain, I collect  laces, fringes, tassels, trims, Zari/ Lurex Jacquard borders and tapes, motifs, sequin trims and buttons. They come in handy to jazz up almost anything from boxes to lamp shades and from dresses to bags.

I have a picture tutorial of how to jazz up your coasters. I think from that you will get a basic technique of other projects.


and then...


The same way I made the lamps which you saw on Tuesday in the tour of my apartment in Zürich ..

This is before jazzing up the lamp: It is Ikea ÅRSTID table lamp.

and this is after..


One side of the lamp... and below is the other side...(just so that I don't get bored of one side)


 First I removed the shades from the lamps.
As shown above I fixed the borders to the lamp shade.
Stitched the bigger button on one side.
On the other side I glued the small beads and with golden acrylics color made dots(It looked like a sari pattern:))
Attach the shades back to the base.
I tied a white ribbon to the base rod of the lamp. 
Tied a bow with a golden ribbon at the bottom.

(After using them for 2 years I have put these lamps to rest in the recycling center while coming here. They will be always remembered fondly:))


The same way I made these..bamboo carpet and mats(not the cushions..LOL)


I used our not-in-use-anymore Bamboo carpet..
  • I cut it in different sizes with sharp scissors..This one really tested my patience as the carpet started falling apart.. soon there was bamboos everywhere..and I thought I am creating more mess than anything creative..But after ruining almost half the carpet I accomplished it..phew!!)
  • Tape off all the sides
  • With permanent glue fix the borders and sequins
  • Make design with glitter paint..
  • Voila .. Your new smaller mats/carpets are ready!!!!

I kept these under floor lamps.. the reclining chair...etc This helped in avoiding scratches on the wooden floor!!


Phew I am tired now.. 3 tutorials in one!!!

oh wait where are going ..I am not done yet..
I found these g8t sites which show wonderful ways for creative DIY lightning and lampshades..
Quick lampshades by BHG
Lampshade liner by Martha Stewart


Tuesday, September 21, 2010

Cozy corners in my home in Zürich...

This time I am sharing something different from the usual post of dining table decor .. Change feels very refreshing!! So today I am sharing my previous apartment in Zürich ..the cozy corners .. table tops.. everything besides dining table decor!!


My home decor would be best described as Indian/Asian decor with European influence.The first picture is of my living room..My living room revolved around the fireplace.. My fireplace mantel decor changed according to the seasons.. This particular picture is taken early this year when it was snowing.. My glass reindeer in his striking pose made it all look so merry to me..


This second picture is from the entrance to the living room .. I have tell you that I do not have much of  a green thumb ..yes thats right..you might wonder I see so many plants which look green and happy.. I think they are best and the most strongest and durable plants of all..This one is peace lily which apart from purifying the air , stays alive for many days without water..(at least mine did..lol) The paintings on the wall are mine.. The coziest corner for me was on the sofa ..I kept my laptop on its arm and surfed your beautiful blogs from there!!


This was the most peaceful corner in my house..with the Buddha statue ..behind are  wooden coasters I had brought from Malaysia. I am finally planning to use them for what are meant to be used as- coasters:)


Later on I changed its decor with some of my new paintings of Ganesha and it was the most relaxing and peaceful place in the home for both of us.. 


So finally some table top decor..Sharing today are my bedside table decor.. simple and practical..  I have a bad habit of sitting on the bed while painting..Its a creative corner:)) Luckily never splashed color here and there:) The Golden Pothos or silver vine grew in a reused jam bottle to which I tied a green ribbon..! The clock is a replica of the royal French clock..a souvenir from Paris. 


The other room had these lamps on the bedside table which I had decorated.. I got bored of the plain lamp shades so I just jazzed them up. Just so I don't get bored of this side, I made the other side with different pattern. The carved box is from India ..matryoshka dolls from Moscow..and the kiola is from Sydney and the bed linen is from Usa( I think JC penny)


The other side of the lamp shades..


Lastly this is the window sill near one of the corner windows where I could spend hours whenever I had time looking at the magnificent ZüriSee or lake Zürich.. 


On a clear full moon night we would sit there watching the moon ... its beautiful  reflection in the water.. It was very romantic!! Below is the picture of the view in summer..


Hope you guys liked the cozy corners.. table tops.. and other things in my home!! I loved my home in Zürich.. It was the only thing I felt sad before leaving.. But thats the part of being a global citizen:) I am looking forward to decorating my new home ... It would be fun!!


Check my tutorial here to see more to jazz up with lamps, carpets and coasters with ribbons and borders.. 


Monday, September 20, 2010

Beauty in simplicity!!


Today I am sharing with you a painting i did some time back.I had collected a brochure of tribal India/ India tourism long time back!! This girl's picture was on the cover. Since I like to paint tribal/rural Indian girls and women..I think they are so beautiful..No makeup..all natural..there is a certain glow on their face !! All the beautiful authentic jewelery they wear.. Vibrant colors and dances..!!! They a live a very simple yet happy and satisfied life!! 


Sorry for the poor photography as this picture was taken by my iPhone. 
I was fascinated by the jewelery worn by the girl.. Tribal Indian wear such beautiful jewelery, colourful clothes with unique embroidery..all handmade and with eye for details .. I would like paint more girls like these in coming years.. I have learned that I am good at oil rather than acrylics.. This one I have used knife and brush both..The strokes look much better in reality..I was happy with depth and dimensions of the painting!!

Happy Monday!!

Friday, September 17, 2010

On the way to Italy...


When we drove to Italy last month .It was a very hot summer day. My husband insisted on leaving early in the morning..I not being a morning person it was tough but yes we managed..The Gotthard Pass between German speaking  and Italian speaking Switzerland is notorious for traffic jams, long tunnels and accidents. Though we started early but we still were stuck in long traffic jam at the Pass for 1 hour..really frustrating! But the weather helped.. It is so good to travel on a clear blue day with only few clouds floating in the sky.. 


We passed by beautiful Italian alps.. every green trees..quaint towns/villages.. magnificent churches which were build on the top of the mountains.. As we passed the cooler region and moved deeper into warmer Italy.. 


.....We passed by Tuscan colored houses- earthy colors like terra cotta, browns, deep reds, oranges, yellows. Wineries.. farms .. castles and fortress..!!!  Awesome!! 


Driving in Europe is something very exciting..kind of adventure for us.. different languages and signs ..different driving styles.. .when people are mean or extra nice to you after seeing your swiss number plate..food or restaurants along the way..different words for petrol ..yes the excitement and anxiety as to what should I fill and the people who try to help .. talking in sign language as we don't speak the same language!!


Do visit Skywatch Friday for more stunning travel pictures and skies!!

Thursday, September 16, 2010

Cinnamon Candle Tutorial

Warm, bright and comforting cinnamon candle create a festive ambiance . Cinnamon is one of favorite spices.. I always put a small piece of cinnamon stick in curries or coconut rice or Biryani..


This project came to my mind because I had lots of cinnamon  and I didn't want to throw them as there are restrictions on how much spices we can ship from Zürich to Singapore. Necessity is the mother of invention!!


So the idea came from the similar kind of cinnamon candles I had bought from Christmas market in Zürich last year..So I decided to try make them myself..


I have to admit that there many easier ways to do this project(I will share with the links of the easier methods at the end of this post)..If you decide to it my way,please be careful with the flame of the lighter especially if you have small kids.


Let's see what is needed for this craft project...


Pillar Candle 
Cinnamon sticks
Candle lighter

Let's start..
Spread a paper or cloth on your work station. So that the melting wax won't drip on your table.. Start melting the top layer of wax with the lighter.Only heat that area where you will be fixing the cinnamon stick.


In 2 seconds or so when you see the wax starts melting, press the cinnamon stick on it. Hold it for 5-6 secs or till you think it is fixed permanently to the candle.


I melted the wax near the fixed Cinnamon sticks by holding it horizontally. I let the wax drip over the fixed stick..so as to fix it. 


At the end my goal was accomplished ..I used almost all of the Cinnamon sticks I had..Plus I covered my plain candle too..To be honest I had tried painting and then this  project on the same candle and both of them failed..so it was more like either I throw it or beautify it;)


It took me an hour for this medium sized candle.. I put a few drops of cinnamon oil in the candle to enhance its fragrance ..

I made another smaller candle with star anise . But star anise has a very strong smell .. though it does look good in decoration and in food...

Ok..so as I was saying earlier this method is not the easiest/simplest of the ones..Just recently I found out while goggling something that Martha did this same kind of candle way back in 2005 with a hot glue gun..Check it out here.

These candles are perfect for Fall and Christmas!! I think I am gonna make some more cinnamon candles..(once my stuff arrives from Zürich)!!

ShareThis